作者:Adam Freeman
翻译:陈广
日期:2018-12-28
本章中我将 SportsStore 应用程序的数据模型扩展到单个Product类之外。我将向您展示如何通过用单独的类替换字符串属性来使数据正常化,并解释如何在创建数据后访问数据。我还添加了对客户订单的支持,这是任何在线商店必不可少的一部分。
本章,我继续使用在第4章中创建并在此后的章节中修改的 SportsStore 项目。为准备本章,我将把创建和编辑Product对象的过程合并到一个视图中。在清单7-1中,我组合了 Home 控制器中添加和更新Product对象的 action 方法,并移除了执行批量更新的 aciton。
提示:您可以从本书 GitHub 存储库 https://github.com/apress/pro-ef-core-2-for-asp.net-core-mvc 下载本章的 SportsStore 项目以及其它所有章节的项目。
清单 7-1:Controllers 文件夹下的 HomeController.cs 文件,合并操作
using Microsoft.AspNetCore.Mvc;
using SportsStore.Models;

namespace SportsStore.Controllers
{
    public class HomeController : Controller
    {
        private IRepository repository;
        public HomeController(IRepository repo) => repository = repo;

        public IActionResult Index()
        {
            return View(repository.Products);
        }

        public IActionResult UpdateProduct(long key)
        {
            return View(key == 0 ? new Product() : repository.GetProduct(key));
        }

        [HttpPost]
        public IActionResult UpdateProduct(Product product)
        {
            if (product.Id == 0)
            {
                repository.AddProduct(product);
            }
            else
            {
                repository.UpdateProduct(product);
            }
            return RedirectToAction(nameof(Index));
        }

        [HttpPost]
        public IActionResult Delete(Product product)
        {
            repository.Delete(product);
            return RedirectToAction(nameof(Index));
        }
    }
}
合并操作依赖于long属性的默认值来确定用户想要修改现在对象还是创建一个新对象。在清单7-2中,我更新了 Index 视图以反应控制器的修改。
清单 7-2:Views/Home 文件夹下的 Index.cshtml 文件,反应控制器更改
@model IEnumerable<Product>

<h3 class="p-2 bg-primary text-white text-center">Products</h3>

<div class="container-fluid mt-3">
    <div class="row">
        <div class="col-1 font-weight-bold">Id</div>
        <div class="col font-weight-bold">Name</div>
        <div class="col font-weight-bold">Category</div>
        <div class="col font-weight-bold text-right">Purchase Price</div>
        <div class="col font-weight-bold text-right">Retail Price</div>
        <div class="col"></div>
    </div>
    @foreach (Product p in Model)
    {
        <div class="row p-2">
            <div class="col-1">@p.Id</div>
            <div class="col">@p.Name</div>
            <div class="col">@p.Category</div>
            <div class="col text-right">@p.PurchasePrice</div>
            <div class="col text-right">@p.RetailPrice</div>
            <div class="col">
                <form asp-action="Delete" method="post">
                    <a asp-action="UpdateProduct" asp-route-key="@p.Id"
                       class="btn btn-outline-primary">
                        Edit
                    </a>
                    <input type="hidden" name="Id" value="@p.Id" />
                    <button type="submit" class="btn btn-outline-danger">
                        Delete
                    </button>
                </form>
            </div>
        </div>
    }
    <div class="text-center p-2">
        <a asp-action="UpdateProduct" asp-route-key="0"
           class="btn btn-primary">Add</a>
    </div>
</div>
在 SportsStore 项目文件夹下运行清单7-3所示的命令以重建数据库,这将确保您在示例中获得期望的结果。
清单 7-3:删除并重建数据库
dotnet ef database drop --force
dotnet ef database update
使用dotnet run启动应用程序,并导航至 http://localhost:5000;您将看到图7-1所示的内容。不要在数据库中添加任何数据,因为在下一节中将使用新迁移更新数据库,而现在添加的数据将产生异常。
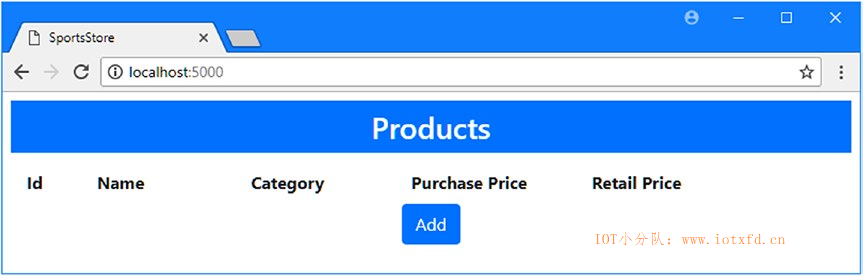
此刻,创建的每个Product对象都有一个使用字符串值表示的Category值。在实际项目中,一个错误的输入将产品放入意想不类别中只是一个时间问题。为避免这类问题,可以使用关系规范应用程序的数据,这可以减少重复并保持一致性,如我在下面几节中所演示的那样。
首先创建一个新的数据模型类。我在 Models 文件夹下添加了一个名为 Category.cs 的文件,并使用它定义清单7-4所示的类。
清单 7-4:Models 文件夹下的 Category.cs 文件的内容
namespace SportsStore.Models
{
    public class Category
    {
        public long Id { get; set; }
        public string Name { get; set; }
        public string Description { get; set; }
    }
}
Category类将表示一个产品类别。Id属性是主键属性,Name和Description属性将在新类别创建时由用户提供,并存储在数据库中。
下一步是在两个数据模型类之间创建关系,这是通过向其中一个类添加属性来完成的。在任何数据关系中,其中一个类称为依赖实体,而属性就是添加到这个类中的。若要确定哪个类是依赖实体,请问自己哪种类型的对象不能在没有其他对象的情况下存在。在 SportsStore 应用程序中,类别可以在不包含任何产品的情况下存在,但我希望每个产品都属于一个类别 —— 这意味着在这种情况下Product类是依赖实体。在清单7-5中,我向Product类添加了两个属性,用于为Category类创建关系。
提示:如果现在无法理解依赖实体请不要担心。我将在第14章返回此话题进行更详细的讲解,在您具备了 Entity Framework Core 的经验后将会更适应此概念。
清单 7-5:Models 文件夹下的 Product.cs 文件,添加关系属性
namespace SportsStore.Models
{
    public class Product
    {
        public long Id { get; set; }
        public string Name { get; set; }
        //public string Category { get; set; }
        public decimal PurchasePrice { get; set; }
        public decimal RetailPrice { get; set; }
        public long CategoryId { get; set; }
        public Category Category { get; set; }
    }
}
我添加的第一个属性名为CategoryId,它是外键属性的示例,Entity Framework Core 将使用该属性通过分配标识Category对象的主键值来跟踪关系。外键属性的名称是由类名加上主键属性名组成的,所以它的名称为CategoryId。
第二个属性取代了现有的Category属性,它是导航属性的示例。Entity Framework Core 将使用外键属性标识的Category对象填充该属性,这使得处理数据库中的数据更加自然。
要访问Category对象,我向数据库 context 类添加了一个DbSet<T>属性,如清单7-6所示。
清单 7-6:Models 文件夹下的 DataContext.cs 文件,添加属性
using Microsoft.EntityFrameworkCore;
namespace SportsStore.Models
{
    public class DataContext : DbContext
    {
        public DataContext(DbContextOptions<DataContext> opts) : base(opts) { }
        public DbSet<Product> Products { get; set; }
        public DbSet<Category> Categories { get; set; }
    }
}
新属性跟现存的那个遵循相同的模式:它是一个带有get和set访问器的public属性,并返回DbSet<T>,其中T是我想要保存在数据库中的类。
展开数据模型时,可以通过向现有存储库添加成员或创建新的存储库,为应用程序的其他部分提供对新数据类型的访问。对于 SportsStore 应用程序,我将创建一个单独的存储库,以演示它是如何完成的。我在 Models 文件夹下添加了一个名为 CategoryRepository.cs 的文件,并使用它定义了如清单7-7所示的接口和实现类。
清单 7-7:Models 文件夹下的 CategoryRepository.cs 文件的内容
using System.Collections.Generic;

namespace SportsStore.Models
{
    public interface ICategoryRepository
    {
        IEnumerable<Category> Categories { get; }
        void AddCategory(Category category);
        void UpdateCategory(Category category);
        void DeleteCategory(Category category);
    }
    public class CategoryRepository : ICategoryRepository
    {
        private DataContext context;
        public CategoryRepository(DataContext ctx) => context = ctx;
        public IEnumerable<Category> Categories => context.Categories;
        public void AddCategory(Category category)
        {
            context.Categories.Add(category);
            context.SaveChanges();
        }
        public void UpdateCategory(Category category)
        {
            context.Categories.Update(category);
            context.SaveChanges();
        }
        public void DeleteCategory(Category category)
        {
            context.Categories.Remove(category);
            context.SaveChanges();
        }
    }
}
我已经在单个文件中定义了存储库接口和实现类,并使用最简单的方法来实现更新,并没有依赖更改检测功能。在清单7-8中,我在Startup类中注册了存储库及其实现,以便与依赖注入一起使用。
清单 7-8:SportsStore 文件夹下的 Startup.cs 文件,注册存储库
using System.Threading.Tasks;
using Microsoft.AspNetCore.Builder;
using Microsoft.AspNetCore.Hosting;
using Microsoft.Extensions.DependencyInjection;
using SportsStore.Models;
using Microsoft.EntityFrameworkCore;
using Microsoft.Extensions.Configuration;

namespace SportsStore
{
    public class Startup
    {
        public Startup(IConfiguration config) => Configuration = config;

        public IConfiguration Configuration { get; }

        public void ConfigureServices(IServiceCollection services)
        {
            services.AddMvc();
            services.AddTransient<IRepository, DataRepository>();
            services.AddTransient<ICategoryRepository, CategoryRepository>();
            string conString = Configuration["ConnectionStrings:DefaultConnection"];
            services.AddDbContext<DataContext>(options =>
                options.UseSqlServer(conString));
        }

        public void Configure(IApplicationBuilder app, IHostingEnvironment env)
        {
            app.UseDeveloperExceptionPage();
            app.UseStatusCodePages();
            app.UseStaticFiles();
            app.UseMvcWithDefaultRoute();
        }
    }
}
在更新数据库以匹配数据模型的更改之前,Entity Framework Core 无法存储Category对象。要更新数据库,必须创建一个新的迁移并将其应用到数据库中,这是通过在 SportsStore 项目文件夹中运行清单7-9所示的命令来实现的。
提示:如果您在运行
dotnet ef database update命令时引发了一个异常,那么可能的原因是在运行清单7-3中的命令之后,将Product数据添加到了数据库中。再次运行清单7-3中的命令,数据库将被重置并更新为清单7-9中创建的迁移。
清单 7-9:创建并应用数据库迁移
dotnet ef migrations add Categories
dotnet ef database update
第一个命令创建了一个名为 Categories 的迁移,它将包含准备数据库以存储新对象所需的命令。第二个命令执行这些命令以更新数据库。
我已经创建了Product和Category类所需的关系,这意味着每个Product必须关联一个Category对象。这种关系对于为用户提供管理数据库中类别对象的手段是很有帮助的。我在 Controllers 文件夹下添加了一个名为 CategoriesController.cs 的类文件,并使用它创建了清单7-10所示的控制器。
提示:必要关系的替代方案是可选关系,其中
Product对象可以与Category关联,但不是必需的。我将在第2部分中详细解释如何创建两种关系。
清单 7-10:Controllers 文件夹下的 CategoriesController.cs 文件的内容
using Microsoft.AspNetCore.Mvc;
using SportsStore.Models;

namespace SportsStore.Controllers
{
    public class CategoriesController : Controller
    {
        private ICategoryRepository repository;
        public CategoriesController(ICategoryRepository repo) => repository = repo;
        public IActionResult Index() => View(repository.Categories);

        [HttpPost]
        public IActionResult AddCategory(Category category)
        {
            repository.AddCategory(category);
            return RedirectToAction(nameof(Index));
        }

        public IActionResult EditCategory(long id)
        {
            ViewBag.EditId = id;
            return View("Index", repository.Categories);
        }

        [HttpPost]
        public IActionResult UpdateCategory(Category category)
        {
            repository.UpdateCategory(category);
            return RedirectToAction(nameof(Index));
        }

        [HttpPost]
        public IActionResult DeleteCategory(Category category)
        {
            repository.DeleteCategory(category);
            return RedirectToAction(nameof(Index));
        }
    }
}
Categories控制器接收存储库通过其构造函数访问类别数据,并定义了支持查询数据库和创建、更新以及删除Category对象的 action。为给控制器提供视图,我创建了 Views/Categories 文件夹并向其中添加了一个名为 Index.cshtml 的文件,内容如清单7-11所示。
清单 7-11:Views/Categories 文件夹下的 Index.cshtml 文件的内容
@model IEnumerable<Category>

<h3 class="p-2 bg-primary text-white text-center">Categories</h3>

<div class="container-fluid mt-3">
    <div class="row">
        <div class="col-1 font-weight-bold">Id</div>
        <div class="col font-weight-bold">Name</div>
        <div class="col font-weight-bold">Description</div>
        <div class="col-3"></div>
    </div>
    @if (ViewBag.EditId == null)
    {
        <form asp-action="AddCategory" method="post">
            @Html.Partial("CategoryEditor", new Category())
        </form>
    }
    @foreach (Category c in Model)
    {
        @if (c.Id == ViewBag.EditId)
        {
            <form asp-action="UpdateCategory" method="post">
                <input type="hidden" name="Id" value="@c.Id" />
                @Html.Partial("CategoryEditor", c)
            </form>
        }
        else
        {
            <div class="row p-2">
                <div class="col-1">@c.Id</div>
                <div class="col">@c.Name</div>
                <div class="col">@c.Description</div>
                <div class="col-3">
                    <form asp-action="DeleteCategory" method="post">
                        <input type="hidden" name="Id" value="@c.Id" />
                        <a asp-action="EditCategory" asp-route-id="@c.Id"
                           class="btn btn-outline-primary">Edit</a>
                        <button type="submit" class="btn btn-outline-danger">
                            Delete
                        </button>
                    </form>
                </div>
            </div>
        }
    }
</div>
此视图提供了一个一体化接口,用于管理类别,并通过分部视图代理对象的创建和编辑。要创建分部视图,我在 Views/Categories 文件夹中创建了一个名为 CategoryEditor.cshtml 的文件,并添加了如清单7-12所示的内容。
清单 7-12:Views/Categories 文件夹下的 CategoryEditor.cshtml 文件的内容
@model Category

<div class="row p-2">
    <div class="col-1"></div>
    <div class="col">
        <input asp-for="Name" class="form-control" />
    </div>
    <div class="col">
        <input asp-for="Description" class="form-control" />
    </div>
    <div class="col-3">
        @if (Model.Id == 0)
        {
            <button type="submit" class="btn btn-primary">Add</button>
        }
        else
        {
            <button type="submit" class="btn btn-outline-primary">Save</button>
            <a asp-action="Index" class="btn btn-outline-secondary">Cancel</a>
        }
    </div>
</div>
为了更容易地移动应用程序,我将清单7-13中所示的元素添加到共享布局中。
清单 7-13:Views/Shared 文件夹下的 _Layout.cshtml 文件,添加元素
<!DOCTYPE html>
<html>
<head>
    <meta name="viewport" content="width=device-width" />
    <title>SportsStore</title>
    <link rel="stylesheet" href="~/lib/bootstrap/dist/css/bootstrap.min.css" />
    <style>
        .placeholder {
            visibility: collapse;
            display: none
        }

            .placeholder:only-child {
                visibility: visible;
                display: flex
            }
    </style>
</head>
<body>
    <div class="container-fluid">
        <div class="row p-2">
            <div class="col-2">
                <a asp-controller="Home" asp-action="Index"
                   class="@GetClassForButton("Home")">
                    Products
                </a>
                <a asp-controller="Categories" asp-action="Index"
                   class="@GetClassForButton("Categories")">
                    Categories
                </a>
            </div>
            <div class="col">
                @RenderBody()
            </div>
        </div>
    </div>
</body>
</html>

@functions {
string GetClassForButton(string controller)
    {
        return "btn btn-block " + (ViewContext.RouteData.Values["controller"]
        as string == controller ? "btn-primary" : "btn-outline-primary");
    }
}
我添加了选择Product和Categories控制器的按钮,它有一个简单的内联函数,用于使用 Bootstrap CSS 样式来高亮显示当前使用的控制器的按钮。
注意:我并不经常使用内联 Razor 函数,因为我更愿意将所有 C# 代码留在类文件中。但在本例情形中,内联函数的好处是保持示例的简洁,它只与视图中的内容相关,并且比创建视图组件更容易。
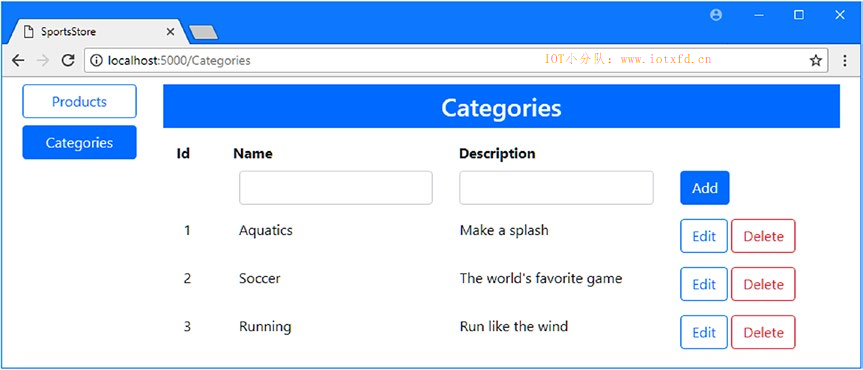
完成数据关系后,使用一些数据是有帮助的。使用dotnet run启动应用程序,单击【Categories】按钮,并通过 HTML 表单使用表7-1中的值创建类别。
表 7-1:创建类别所需的数据值
| Name | Description |
|---|---|
| Watersports | Make a splash |
| Soccer | The world's favorite game |
| Running | Run like the wind |
当您添加完所有3个类别,将看到图7-2所示的内容。
必须更新应用程序中处理Product对象的部分,以反映数据库中的新关系。此过程有两部分:在查询数据库时包含类别数据,以及在创建或编辑产品时允许用户选择类别。
Entity Framework Core 忽略关系,除非将它们显式地包含在查询中。这意味着默认情况下,诸如由Product类定义的Category这样的导航属性的值将为null。Include扩展方法用于告诉 Entity Framework Core 使用关联数据填充导航属性,并在表示查询的IQueryable<T>对象上调用。在清单7-14中,我使用了Include方法将关联的Category对象包含在产品存储库所做的查询中。
清单 7-14:Models 文件夹下的 DataRespository.cs 文件,包含关联数据
using System.Collections.Generic;
using System.Linq;
using Microsoft.EntityFrameworkCore;
namespace SportsStore.Models
{
    public class DataRepository : IRepository
    {
        private DataContext context;
        public DataRepository(DataContext ctx) => context = ctx;
        public IEnumerable<Product> Products => context.Products
            .Include(p => p.Category).ToArray();
        public Product GetProduct(long key) => context.Products
            .Include(p => p.Category).First(p => p.Id == key);

        public void AddProduct(Product product)
        {
            context.Products.Add(product);
            context.SaveChanges();
        }

        public void UpdateProduct(Product product)
        {
            Product p = context.Products.Find(product.Id);
            p.Name = product.Name;
            //p.Category = product.Category;
            p.PurchasePrice = product.PurchasePrice;
            p.RetailPrice = product.RetailPrice;
            p.CategoryId = product.CategoryId;
                context.SaveChanges();
        }

        public void UpdateAll(Product[] products)
        {
            Dictionary<long, Product> data = products.ToDictionary(p => p.Id);
            IEnumerable<Product> baseline =
                context.Products.Where(p => data.Keys.Contains(p.Id));
            foreach (Product databaseProduct in baseline)
            {
                Product requestProduct = data[databaseProduct.Id];
                databaseProduct.Name = requestProduct.Name;
                databaseProduct.Category = requestProduct.Category;
                databaseProduct.PurchasePrice = requestProduct.PurchasePrice;
                databaseProduct.RetailPrice = requestProduct.RetailPrice;
            }
            context.SaveChanges();
        }

        public void Delete(Product product)
        {
            context.Products.Remove(product);
            context.SaveChanges();
        }
    }
}
Include方法是在Mocrosoft.EntityFrameworkCore命名空间中定义的,它接收一个 lambad 表达式,该表达式选择您希望 Entity Framework Core 在查询中包含的导航属性。用于GetProduct方法的Find方法不能与Include方法一起使用,所以我使用了First方法进行替代,从而达到相同的效果。这些更改的结果是 Entity Framework Core 将填充由Products属性和GetProduct方法创建的Product对象的Product.Category导航属性。
注意我对UpdateProduct方法所做的更改。首先我并未通过GetProduct方法而是直接查询基线数据,因为我不希望在执行更新时加载关联数据。其次,我注释掉了设置Category属性的语句,并添加了一条设置CategoryId属性的语句。设置外键属性是 Entity Framework Core 更新数据库中两个对象之间关系所需的全部内容。
在清单7-15中,我更新了 Home 控制器,以便它可以通过存储库访问Category数据,并将数据传递给它的视图。这将允许视图在编辑或创建Product对象时从完整的类别集合进行选择。
清单 7-15:Controllers 文件夹下的 HomeController.cs 文件,使用类别数据
using Microsoft.AspNetCore.Mvc;
using SportsStore.Models;

namespace SportsStore.Controllers
{
    public class HomeController : Controller
    {
        private IRepository repository;
        private ICategoryRepository catRepository;

        public HomeController(IRepository repo, ICategoryRepository catRepo)
        {
            repository = repo;
            catRepository = catRepo;
        }

        public IActionResult Index()
        {
            return View(repository.Products);
        }

        public IActionResult UpdateProduct(long key)
        {
            ViewBag.Categories = catRepository.Categories;
            return View(key == 0 ? new Product() : repository.GetProduct(key));
        }

        [HttpPost]
        public IActionResult UpdateProduct(Product product)
        {
            if (product.Id == 0)
            {
                repository.AddProduct(product);
            }
            else
            {
                repository.UpdateProduct(product);
            }
            return RedirectToAction(nameof(Index));
        }
        [HttpPost]
        public IActionResult Delete(Product product)
        {
            repository.Delete(product);
            return RedirectToAction(nameof(Index));
        }
    }
}
为使得用户在创建或编辑一个Product时可以选择一个类别,我在 UpdatedProduct 视图中添加了一个select元素,如清单7-16所示。
清单 7-16:Views/Home 文件夹下的 UpdateProduct.html 文件,显示类别
@model Product

<h3 class="p-2 bg-primary text-white text-center">Update Product</h3>

<form asp-action="UpdateProduct" method="post">
    <div class="form-group">
        <label asp-for="Id"></label>
        <input asp-for="Id" class="form-control" readonly />
    </div>
    <div class="form-group">
        <label asp-for="Name"></label>
        <input asp-for="Name" class="form-control" />
    </div>
    <div class="form-group">
        <label asp-for="Category"></label>
        <select class="form-control" asp-for="CategoryId">
            @if (Model.Id == 0)
            {
                <option disabled selected>Choose Category</option>
            }
            @foreach (Category c in ViewBag.Categories)
            {
                <option selected=@(Model.Category?.Id == c.Id)
                        value="@c.Id">@c.Name</option>
            }
        </select>
    </div>
    <div class="form-group">
        <label asp-for="PurchasePrice"></label>
        <input asp-for="PurchasePrice" class="form-control" />
    </div>
    <div class="form-group">
        <label asp-for="RetailPrice"></label>
        <input asp-for="RetailPrice" class="form-control" />
    </div>
    <div class="text-center">
        <button class="btn btn-primary" type="submit">Save</button>
        <a asp-action="Index" class="btn btn-secondary">Cancel</a>
    </div>
</form>
如果视图用于创建新的Product对象,则包含占位符option元素。并在编辑现有对象时使用 Razor 表达式应用selected属性。
剩下的就是更新 Index 视图以使用导航属性,并显示每个产品对象的所属类别的名称,如清单7-17所示。
清单 7-17:Views/Home 文件夹下的 Index.cshtml 文件,使用导航属性
@model IEnumerable<Product>
<h3 class="p-2 bg-primary text-white text-center">Products</h3>
<div class="container-fluid mt-3">
    <div class="row">
        <div class="col-1 font-weight-bold">Id</div>
        <div class="col font-weight-bold">Name</div>
        <div class="col font-weight-bold">Category</div>
        <div class="col font-weight-bold text-right">Purchase Price</div>
        <div class="col font-weight-bold text-right">Retail Price</div>
        <div class="col"></div>
    </div>
    @foreach (Product p in Model)
    {
        <div class="row p-2">
            <div class="col-1">@p.Id</div>
            <div class="col">@p.Name</div>
            <div class="col">@p.Category.Name</div>
            <div class="col text-right">@p.PurchasePrice</div>
            <div class="col text-right">@p.RetailPrice</div>
            <div class="col">
                <form asp-action="Delete" method="post">
                    <a asp-action="UpdateProduct" asp-route-key="@p.Id"
                       class="btn btn-outline-primary">
                        Edit
                    </a>
                    <input type="hidden" name="Id" value="@p.Id" />
                    <button type="submit" class="btn btn-outline-danger">
                        Delete
                    </button>
                </form>
            </div>
        </div>
    }
    <div class="text-center p-2">
        <a asp-action="UpdateProduct" asp-route-key="0"
           class="btn btn-primary">Add</a>
    </div>
</div>
使用dotnet run启动应用程序,并导航至 http://localhost:5000,单击【Add】按钮,并通过表单使用表7-2的数据创建Product对象。在创建每个对象时,使用select元素来从列表中选择类别。
表 7-2:创建产品对象的测试值 | Name | Category | Purchase Price | Retail Price | | - | - | - | - | | Kayak | Watersports | 200 | 275 | | Lifejacket | Watersports | 30 | 48.95 | | Soccer Ball | Soccer | 17 | 19.50 |
在创建每个对象时,Index action 将被执行以显示结果,它会导致 Entity Framework Core 查询数据库以获取Product数据和它关联的Category对象。您可以通过检查应用程序生成的日志消息来查看它是如何转换为 SQL 查询的,如下:
SELECT [p].[Id], [p].[CategoryId], [p].[Name], [p].[PurchasePrice],
    [p].[RetailPrice], [p.Category].[Id], [p.Category].[Description],
    [p.Category].[Name]
FROM [Products] AS [p]
INNER JOIN [Categories] AS [p.Category] ON [p].[CategoryId] = [p.Category].[Id]
Entity Framework Core 使用外键查询所需的数据,以创建与每个Product相关的Category对象,并使用内连接组合来自Products和Categories表的数据。
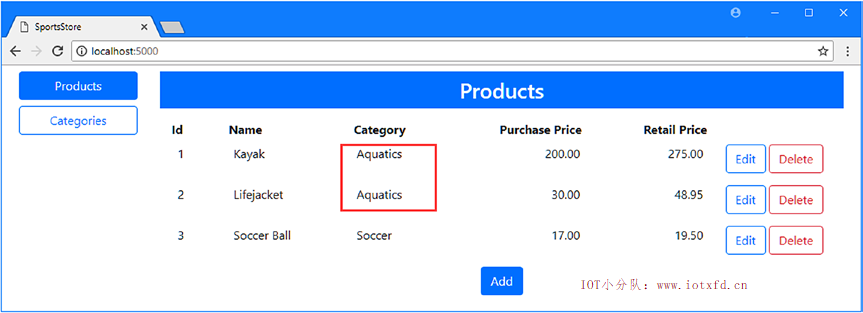
在创建了所有三个Product对象后,单击【Categories】,单击 Watersports 类别的【Edit】按钮,并将【Name】字段的值更改为 Aquatics。单击【Save】按钮并单击【Products】,您将看到编辑类别中的两个Product对象都显示了新的名称,如图7-3所示。
警告:如果您删除一个Category对象,与之相关联的Product对象也将被删除,这是所需关联的默认配置。我将在第22章解释这是如何工作的,以及其他配置选项。
为演示更复杂的关系,我将添加对创建和存储订单的支持,并使用它们来表示客户做出的产品选择。接下来我使用了附加类来扩展数据模型,并更新数据库、添加一个控制器来管理新数据。
我从在 Models 文件夹中添加一个名为 Order.cs 的文件开始,并使用它定义了清单7-18所示的类。
清单 7-18:Models 文件夹下的 Order.cs 文件的内容
using System.Collections.Generic;

namespace SportsStore.Models
{
    public class Order
    {
        public long Id { get; set; }
        public string CustomerName { get; set; }
        public string Address { get; set; }
        public string State { get; set; }
        public string ZipCode { get; set; }
        public bool Shipped { get; set; }
        public IEnumerable<OrderLine> Lines { get; set; }
    }
}
Order类具有存储客户姓名及地址、产品是否已快递的属性。还有一个导航属性,它提供对关联OrderLine对象的访问,该对象将表示单个产品选择。为创建此类,我在 Models 文件夹下添加了名为 OrderLine.cs 文件,其代码如清单7-19所示。
清单 7-19:Models 文件夹下的 OrderLine.cs 文件的内容
namespace SportsStore.Models
{
    public class OrderLine
    {
        public long Id { get; set; }
        public long ProductId { get; set; }
        public Product Product { get; set; }
        public int Quantity { get; set; }
        public long OrderId { get; set; }
        public Order Order { get; set; }
    }
}
每个OrderLine对象都与一个Order和Product相关联,并具有一个指示客户需要多少该新产品的属性。为了方便地访问订单数据,我将清单7-20中所示的属性添加到 context 类中。
清单 7-20:Models 文件夹下的 DataContext.cs 文件,添加属性
using Microsoft.EntityFrameworkCore;
namespace SportsStore.Models
{
    public class DataContext : DbContext
    {
        public DataContext(DbContextOptions<DataContext> opts) : base(opts) { }
        public DbSet<Product> Products { get; set; }
        public DbSet<Category> Categories { get; set; }
        public DbSet<Order> Orders { get; set; }
        public DbSet<OrderLine> OrderLines { get; set; }
    }
}
为了向应用程序的其它部分提供对新数据的一致性访问,我向 Models 文件夹中添加了一个名为 IOrdersRepository.cs 的文件,并使用它定义了清单7-21所示的接口。
清单 7-21:Models 文件夹下的 IOrdersRepository.cs 文件的内容
using System.Collections.Generic;

namespace SportsStore.Models
{
    public interface IOrdersRepository
    {
        IEnumerable<Order> Orders { get; }
        Order GetOrder(long key);
        void AddOrder(Order order);
        void UpdateOrder(Order order);
        void DeleteOrder(Order order);
    }
}
接下来,我在 Models 文件夹中添加了一个名为 OrdersRepository.cs 的文件,并使用它来创建清单7-22所示的实现类。
清单 7-22:Models 文件夹下的 OrdersRepository.cs 文件的内容
using Microsoft.EntityFrameworkCore;
using System.Collections.Generic;
using System.Linq;

namespace SportsStore.Models
{
    public class OrdersRepository : IOrdersRepository
    {
        private DataContext context;
        public OrdersRepository(DataContext ctx) => context = ctx;
        public IEnumerable<Order> Orders => context.Orders
            .Include(o => o.Lines).ThenInclude(l => l.Product);
        public Order GetOrder(long key) => context.Orders
            .Include(o => o.Lines).First(o => o.Id == key);

        public void AddOrder(Order order)
        {
            context.Orders.Add(order);
            context.SaveChanges();
        }

        public void UpdateOrder(Order order)
        {
            context.Orders.Update(order);
            context.SaveChanges();
        }

        public void DeleteOrder(Order order)
        {
            context.Orders.Remove(order);
            context.SaveChanges();
        }
    }
}
存储库实现遵循为其他存储库建立的模式,并放弃了易于使用的更改检测。注意数据模型中使用并将关联数据添加至查询的Include和ThenInclude方法的使用 —— 我在第14-16章中详细描述了这个过程。
在清单7-23中,我在Startup类中添加了一条语句,以便依赖注入系统使用瞬态OrderRepository对象解析对IOrderRepository接口的依赖关系。
清单 7-23:SportsStore 文件夹下的 Startup.cs 文件,配置依赖注入
using System.Threading.Tasks;
using Microsoft.AspNetCore.Builder;
using Microsoft.AspNetCore.Hosting;
using Microsoft.Extensions.DependencyInjection;
using SportsStore.Models;
using Microsoft.EntityFrameworkCore;
using Microsoft.Extensions.Configuration;

namespace SportsStore
{
    public class Startup
    {
        public Startup(IConfiguration config) => Configuration = config;

        public IConfiguration Configuration { get; }

        public void ConfigureServices(IServiceCollection services)
        {
            services.AddMvc();
            services.AddTransient<IRepository, DataRepository>();
            services.AddTransient<ICategoryRepository, CategoryRepository>();
            services.AddTransient<IOrdersRepository, OrdersRepository>();
            string conString = Configuration["ConnectionStrings:DefaultConnection"];
            services.AddDbContext<DataContext>(options =>
                options.UseSqlServer(conString));
        }

        public void Configure(IApplicationBuilder app, IHostingEnvironment env)
        {
            app.UseDeveloperExceptionPage();
            app.UseStatusCodePages();
            app.UseStaticFiles();
            app.UseMvcWithDefaultRoute();
        }
    }
}
在 SportsStore 项目文件夹下运行清单7-24所示的命令以准备数据库,并通过创建和应用 Entity Framework Core 迁移来存储新的数据模型类。
清单 7-24:创建并应用一个新的数据库迁移
dotnet ef migrations add Orders
dotnet ef database update
所有用于处理 Order 对象的 Entity Framework Core 管道都已就绪,下一步是添加 MVC 功能,以便创建和管理实例。我在 Controllers 文件夹下创建了一个名为 OrdersController.cs 的文件,并使用它定义了清单7-25所示的控制器。我省略了AddOrUpdateOrder方法的代码,当其他功能就绪后,我再完成该代码。
清单 7-25:Controllers 文件夹下的 OrdersController.cs 文件的内容
using Microsoft.AspNetCore.Mvc;
using SportsStore.Models;
using System.Collections.Generic;
using System.Linq;

namespace SportsStore.Controllers
{
    public class OrdersController : Controller
    {
        private IRepository productRepository;
        private IOrdersRepository ordersRepository;
        public OrdersController(IRepository productRepo,
            IOrdersRepository orderRepo)
        {
            productRepository = productRepo;
            ordersRepository = orderRepo;
        }

        public IActionResult Index() => View(ordersRepository.Orders);

        public IActionResult EditOrder(long id)
        {
            var products = productRepository.Products;
            Order order = id == 0 ? new Order() : ordersRepository.GetOrder(id);
            IDictionary<long, OrderLine> linesMap
                = order.Lines?.ToDictionary(l => l.ProductId)
                ?? new Dictionary<long, OrderLine>();
            ViewBag.Lines = products.Select(p => linesMap.ContainsKey(p.Id)
                ? linesMap[p.Id]
                : new OrderLine { Product = p, ProductId = p.Id, Quantity = 0 });
            return View(order);
        }
        [HttpPost]
        public IActionResult AddOrUpdateOrder(Order order)
        {
            // ...action method to be completed...
            return RedirectToAction(nameof(Index));
        }
        [HttpPost]
        public IActionResult DeleteOrder(Order order)
        {
            ordersRepository.DeleteOrder(order);
            return RedirectToAction(nameof(Index));
        }
    }
}
EditOrder action 方法中的 LINQ 语句看起来可能很复杂,但是它们准备了OrderLine数据,以便每个产品都有一个对象,即使之前没有对该对象进行选择。
对于新的订单,这意味着ViewBag.Lines属性将使用与数据库中的每个Product对应的OrderLine对象序列填充,Id和Quantity属性设置为 0。当对象存入数据库,Id值为0指示这是一个新对象,数据库服务器将赋予它一个新的唯一主键。
对于现有订单,ViewBag.Lines属性将使用从数据库读取的OrderLine对象填充,剩余产品填入Id属性为0的额外对象。
这种结构利用了 ASP.NET Core MVC 与 Entity Framework Core 相结合的方式,并简化了更新数据库的过程,这一点在您访问本示例的剩余部分时将看到。
下一步是创建一个列出数据库中所有对象的视图。我创建了 Views/Orders 文件夹并在其中添加了一个名为 Index.cshtml 的文件,内容如清单7-26所示。
清单 7-26:Views/Orders 文件夹下的 Index.cshtml 文件的内容
@model IEnumerable<Order>

<h3 class="p-2 bg-primary text-white text-center">Orders</h3>

<div class="container-fluid mt-3">
    <div class="row">
        <div class="col-1 font-weight-bold">Id</div>
        <div class="col font-weight-bold">Name</div>
        <div class="col font-weight-bold">Zip</div>
        <div class="col font-weight-bold">Total</div>
        <div class="col font-weight-bold">Profit</div>
        <div class="col-1 font-weight-bold">Status</div>
        <div class="col-3"></div>
    </div>
    <div>
        <div class="row placeholder p-2">
            <div class="col-12 text-center">
                <h5>No Orders</h5>
            </div>
        </div>
        @foreach (Order o in Model)
        {
            <div class="row p-2">
                <div class="col-1">@o.Id</div>
                <div class="col">@o.CustomerName</div>
                <div class="col">@o.ZipCode</div>
                <div class="col">
                    @o.Lines.Sum(l => l.Quantity
                        * l.Product.RetailPrice)
                </div>
                <div class="col">
                    @o.Lines.Sum(l => l.Quantity
                        * (l.Product.RetailPrice - l.Product.PurchasePrice))
                </div>
                <div class="col-1">@(o.Shipped ? "Shipped" : "Pending")</div>
                <div class="col-3 text-right">
                    <form asp-action="DeleteOrder" method="post">
                        <input type="hidden" name="Id" value="@o.Id" />
                        <a asp-action="EditOrder" asp-route-id="@o.Id"
                           class="btn btn-outline-primary">Edit</a>
                        <button type="submit" class="btn btn-outline-danger">
                            Delete
                        </button>
                    </form>
                </div>
            </div>
        }
    </div>
</div>
<div class="text-center">
    <a asp-action="EditOrder" class="btn btn-primary">Create</a>
</div>
该视图提供了数据库中Order对象的摘要,并显示了所订购产品的总价和所得利润。有一些按钮可以创建新的订单,并编辑和删除现有订单。
为提供创建和编辑一个订单的视图,我在 Views/Orders 文件夹下添加了一个名为 EditOrder.cshtml 的文件,并向其添加了清单7-27所示的内容。
清单 7-27:Views/Orders 文件夹下的 EditOrder.cshtml 文件的内容
@model Order

<h3 class="p-2 bg-primary text-white text-center">Create/Update Order</h3>

<form asp-action="AddOrUpdateOrder" method="post">
    <div class="form-group">
        <label asp-for="Id"></label>
        <input asp-for="Id" class="form-control" readonly />
    </div>
    <div class="form-group">
        <label asp-for="CustomerName"></label>
        <input asp-for="CustomerName" class="form-control" />
    </div>
    <div class="form-group">
        <label asp-for="Address"></label>
        <input asp-for="Address" class="form-control" />
    </div>
    <div class="form-group">
        <label asp-for="State"></label>
        <input asp-for="State" class="form-control" />
    </div>
    <div class="form-group">
        <label asp-for="ZipCode"></label>
        <input asp-for="ZipCode" class="form-control" />
    </div>
    <div class="form-check">
        <label class="form-check-label">
            <input type="checkbox" asp-for="Shipped" class="form-check-input" />
            Shipped
        </label>
    </div>
    <h6 class="mt-1 p-2 bg-primary text-white text-center">Products Ordered</h6>
    <div class="container-fluid">
        <div class="row">
            <div class="col font-weight-bold">Product</div>
            <div class="col font-weight-bold">Category</div>
            <div class="col font-weight-bold">Quantity</div>
        </div>
        @{ int counter = 0; }
        @foreach (OrderLine line in ViewBag.Lines)
        {
            <input type="hidden" name="lines[@counter].Id" value="@line.Id" />
            <input type="hidden" name="lines[@counter].ProductId"
                   value="@line.ProductId" />
            <input type="hidden" name="lines[@counter].OrderId" value="@Model.Id" />
            <div class="row mt-1">
                <div class="col">@line.Product.Name</div>
                <div class="col">@line.Product.Category.Name</div>
                <div class="col">
                    <input type="number" name="lines[@counter].Quantity"
                           value="@line.Quantity" />
                </div>
            </div>
            counter++;
        }
    </div>
    <div class="text-center m-2">
        <button type="submit" class="btn btn-primary">Save</button>
        <a asp-action="Index" class="btn btn-secondary">Cancel</a>
    </div>
</form>
此视图为用户提供了一个表单,其中包含为Order类定义属性的input元素,以及数据库中每个Product对象的元素,在编辑现有对象时,这些元素将使用选定的数量填充。
为使新功能更易于访问,我将清单7-28中所示的元素添加到所有视图共享的布局中。
清单 7-28:Views/Shared 文件夹下的 _Layout.cshtml 文件,添加一个元素
<!DOCTYPE html>
<html>
<head>
    <meta name="viewport" content="width=device-width" />
    <title>SportsStore</title>
    <link rel="stylesheet" href="~/lib/twitter-bootstrap/css/bootstrap.min.css" />
    <style>
        .placeholder {
            visibility: collapse;
            display: none
        }

            .placeholder:only-child {
                visibility: visible;
                display: flex
            }
    </style>
</head>
<body>
    <div class="container-fluid">
        <div class="row p-2">
            <div class="col-2">
                <a asp-controller="Home" asp-action="Index"
                   class="@GetClassForButton("Home")">
                    Products
                </a>
                <a asp-controller="Categories" asp-action="Index"
                   class="@GetClassForButton("Categories")">
                    Categories
                </a>
                <a asp-controller="Orders" asp-action="Index"
                   class="@GetClassForButton("Orders")">
                    Orders
                </a>
            </div>
            <div class="col">
                @RenderBody()
            </div>
        </div>
    </div>
</body>
</html>

@functions {
string GetClassForButton(string controller)
    {
        return "btn btn-block " + (ViewContext.RouteData.Values["controller"]
        as string == controller ? "btn-primary" : "btn-outline-primary");
    }
}
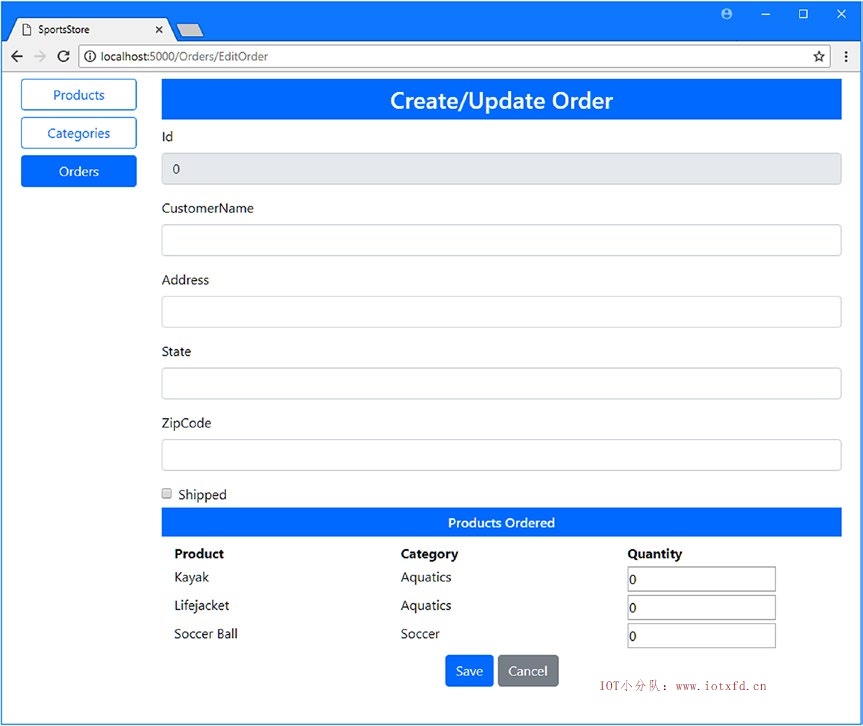
使用dotnet run启动应用程序,并导航至 http://localhost:5000,单击【Orders】按钮,并单击【Create】。您将看到一个空表单,其中包含数据库中所有产品的元素。由于这是一个新的订单,所以所有Quantity字段都是 0,如图7-4所示。
当您单击【Save】按钮时,不会保存数据,因为我在清单7-25中并未完成AddOrUpdateOrder方法。为完成控制器,我在 action 方法中添加了清单7-29所示的代码。
清单 7-29:Controllers 文件夹下的 OrdersController.cs 文件,保存数据
...
[HttpPost]
public IActionResult AddOrUpdateOrder(Order order)
{
    order.Lines = order.Lines
        .Where(l => l.Id > 0 || (l.Id == 0 && l.Quantity > 0)).ToArray();
    if (order.Id == 0)
    {
        ordersRepository.AddOrder(order);
    }
    else
    {
        ordersRepository.UpdateOrder(order);
    }
    return RedirectToAction(nameof(Index));
}
...
在 action 方法中使用的代码依赖于一个有用的 Entity Framework Core 功能:当我将一个Order对象传递给AddOrder或UpdateOrder存储库方法时,Entity Framework Core 将不仅存储Order对象,而且还存储其相关联的OrderLine对象。这似乎并不重要,但它简化了过程,否则需要一系列精心协调的更新。
要查看生成的 SQL 命令,,请使用dotnet run启动应用程序,并导航至 http://localhost:5000/orders,单击【Create】按钮,然后填写表单。您填写的客户详细信息并不重要,但请确保输入表7-3所示的产品数量。
表 7-3:创建一个订单所需的数量值
| Product | Qunatity |
|---|---|
| Kayak | 1 |
| Lifejacket | 2 |
| Soccer Ball | 0 |
当您单击【Save】按钮,将看到应用程序生成的日志消息中的几个 SQL 命令。第一个是存储Order对象,第二个是获取分配给主键的值。
INSERT INTO [Orders] ([Address], [CustomerName], [Shipped], [State], [ZipCode])
VALUES (@p0, @p1, @p2, @p3, @p4);

SELECT [Id]
FROM [Orders]
WHERE @@ROWCOUNT = 1 AND [Id] = scope_identity();
然后,Entity Framework Core 使用Order对象的主键存储OrderLine对象,如下:
DECLARE @inserted0 TABLE ([Id] bigint, [_Position] [int]);
MERGE [OrderLines] USING (
VALUES (@p5, @p6, @p7, 0),
    (@p8, @p9, @p10, 1)) AS i ([OrderId], [ProductId], [Quantity], _Position) ON 1=0
WHEN NOT MATCHED THEN
    INSERT ([OrderId], [ProductId], [Quantity])
    VALUES (i.[OrderId], i.[ProductId], i.[Quantity])
    OUTPUT INSERTED.[Id], i._Position
INTO @inserted0;
最终,Entity Framework Core 查询数据库以获取赋给OrderLine对象的主键,如下:
SELECT [t].[Id] FROM [OrderLines] t
INNER JOIN @inserted0 i ON ([t].[Id] = [i].[Id])
ORDER BY [i].[_Position];
如果无法完全理解 SQL 命令请不要担心。需要注意的是,Entity Frame Core 负责存储相关数据并自动生成 SQL 命令。清单7-29中关于代码的最后一点与以下语句有关:
order.Lines = order.Lines
    .Where(l => l.Id > 0 || (l.Id == 0 && l.Quantity > 0)).ToArray();
此语句排除未为其选择数量的任何OrderLine对象,但已存储在数据库中的对象除外。这将确保数据库中不包含不属于订单的OrderLine对象,但确实允许对以前存储的数据进行更新。
保存数据时,将显示订单摘要,如图7-5所示。
创建和处理关联数据的功能可能会很头痛,接下来,我将描述常见的问题,并解释如何解决这些问题。
当您将迁移应用到与数据库中现有数据不符合的约束的数据库时,通常会发生此异常。比如在 SportsStore 应用程序中,您在应用迁移以单独添加对Category对象的支持之前已经在数据库中创建了Product对象,则引发此异常。数据库中的现有数据将不符合与类别建立外键关系的要求,因此数据库更新将失败。
解决此问题的最简单办法是删除并重建数据库,这将移除它包含的所有数据。但这对于一个生产系统并不适合,在应用迁移之前,必须对数据进行仔细的修改。
当您试图存储新对象更新现有对象时,使用了与应用于数据库的约束不匹配的数据,以支持关联数据,会发生此异常。最有可能的原因是忽略了关联数据的键值。例如,在 SportsStore 应用程序的上下文中,如果您试图存储或更新Product对象时,并未包含CategoryId属性的值,则会发生此异常。如果收到此异常,请确保 HTML 表单包含由数据模型类定义的所有外键属性的input元素。
当您忘记将get和set访问器添加到导航属性,然后使用Include方法选择它时,就会发生此异常。缺少访问器将创建一个字段,而不是属性,使得Include方法不能在查询中跟随它。要解决此问题,请在创建属性时添加get和set访问器。您可能还需要重新创建和重新应用定义关系的迁移。
Entity Framework Core 对分配给其导航属性的数据类型非常敏感,当您在存储数据之前对导航属性集合执行 LINQ 查询时,就会产生此异常,正如我在清单7-29中为 SportsStore 应用程序所做的那样。要修复此问题,请对 LINQ 查询的结果调用ToArray方法,这将产生一个实现 Entity Framework Core 所期望的接口的结果。
当您使用Include方法选择 Entity Framework Core 对于关联数据无法遵循的属性时,就会发生此异常。造成此问题的最常见原因是选择外键属性,而不是与其配对的导航属性。在 SportsStore 应用程序中,如果使用Include方法从OrderLine对象中选择ProductId属性,而不是使用Product,则会看到此错误。
此异常通常发生在您创建一个迁移时,该迁移会扩展带有关系的数据模型,但忘记将其应用于数据库。使用dotnet ef database update命令在您的项目中应用迁移,请参考第13章,我详细解释了迁移是如何工作的。
如果您试图更新一个对象时发现它被删除了,那么可能的原因是您正在加载相关数据,然后在获取用于更改检测的基线数据时将导航属性设置为了null。例如,在 SportsStore 应用程序中,您可以通过查询基线Product对象,使用Include方法加载关联的Category对象,然后在调用SaveChanges方法之前将Category属性设置为null来查看此行为。这种操作组合导致 Entity Framework Core 悄悄删除您想要更新的对象。要解决此问题,请不要加载相关数据,也不要将导航属性设置为null。
这个问题是由于使用 Razor 表达式来选择导航属性值而导致的,该属性返回关联的对象,然后,Razor 调用ToString方法返回类名。若要在视图中包含来自关联数据的数据值,请选择关联对象的属性之一,以便使用@Category.Name,而不仅仅是@Category。
在本章中,我通过添加新的类并在它们之间创建关系来扩展 SportsStore 数据模型。我解释了如何查询关联数据,如何执行更新,以及如何解决这些功能可能导致的最常见问题。在下一章中,我将向您展示如何调整应用程序的 MVC 和 Entity Framework Core 部分来处理大量数据。
;